So many labels, so little time; accelerating our image labelling process
Image source: Wikimedia Commons.
There has been great advancement in recent years in the field of image classification. With pre-trained models readily available and mature libraries making the process of developing and training your own models easy, you can simply take your data and get going… unless you don’t have a lovely clean and labelled dataset to begin with. As anyone who’s manually created a labelled dataset before will know, labelling is a slow and laborious process, and if the categories aren’t clear a priori, you may end up going through your dataset multiple times.
This is what motivated us to develop an in-house tool to rapidly speed up the creation of labelled datasets.
The Problem
On Auto Trader, we have over 17 million images of vehicles advertised on any given day. Some of these images are of the front of the car, the boot, a scratch on the bonnet, and sometimes a goat (yes really!).
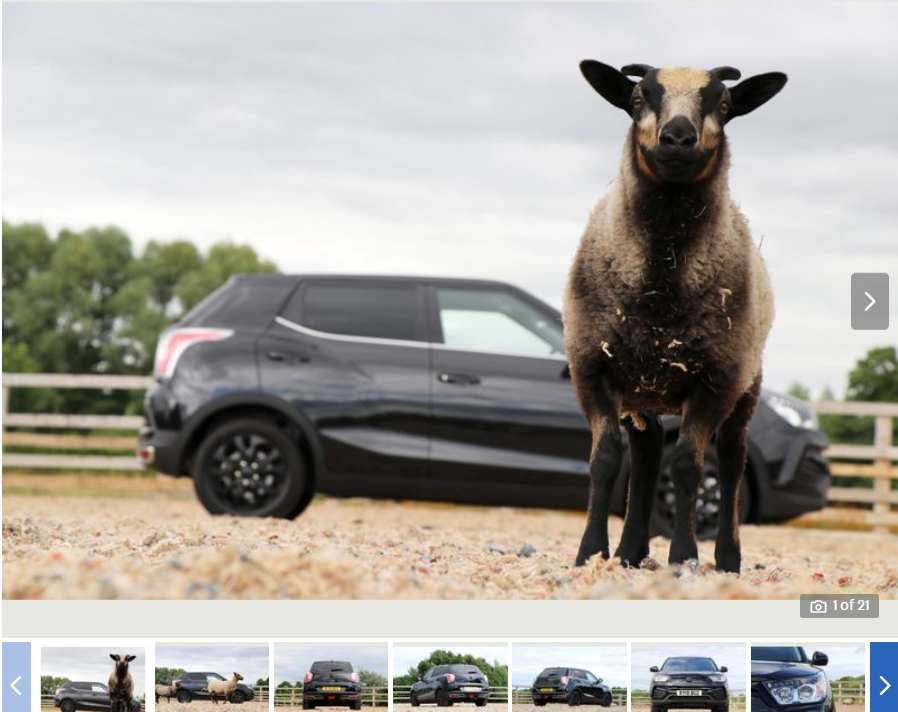
Yes, this is from a real advert
There are many scenarios where we’d want to extract information about the image, all with particular requirements requiring different types of labels. In order to label all 17M+ images we are going to need to automate the process, for example, lets say we want to extract the orientation of the vehicle in the image; first we need to come up with a sensible set of categories. We can make a start with some suggestions like [Front, Driver Side, Rear], but what about the rarer categories? And how granular should we go? Is [Front Interior, Rear Interior, Boot Interior] sufficient, or do we need to label things like odometers, door handles, and pedals? We needed to refine whatever categories we came up with, which would mean relabelling at least once.
We also suspected a significant number of images would be fairly easy for a machine learning (ML) model to learn. An initial analysis on a sample of data suggested that around 70% of adverts show the front-driver’s side as the first image, so finding examples for front-driver’s side would be easy. The challenge would be finding enough examples of the rare classes to train with.
Our Approach
Without wishing to reinvent the wheel, we looked at the tools out there to aid in labelling images. We found they mostly focussed on drawing bounding boxes around segments of images, with none providing what we were really looking for. Another approach would be using a service like AWS Ground Truth, which outsources the labelling to other people, raising questions about cost, quality, and consistency. In the end, we decided the best approach would be to build something ourselves in Streamlit.
If you have not come across Streamlit before, it is a Python library for building web apps. Being Python native, it is relatively easy to pick up for those more at home in the world of ML and is useful to get something up and running quickly.
Our approach can be broken down into 4 core stages:
- Generating image embeddings
- Similarity-assisted manual labelling
- Training a basic model
- Confirming/correcting the model’s predictions
Once we have the labelled dataset we can then leverage a larger model and make that available to the rest of our data platform via an API.
Embedding Assisted Labelling
The first step was to start labelling anything at all. For our use case, we wanted a representative sample of images hosted on Auto Trader. To ensure we captured a broad range of vehicles, and not just what’s popular, we took at least one image of every car generation on Auto Trader (~4,000 in total), e.g. Ford Fiesta Mk 6 (2008-2016). We then took 6,000 random images from Auto Trader as well, for a total of 10,000 images to label.
To generate labels for the initial sample of images we took a pre-trained model - there are many available on Hugging Face - and used that to create embeddings for each image in our dataset. To create an embedding you effectively chop the end off of a neural network and take the vector of values present in the penultimate layer. The take-away point is that “similar” images will have vectors that are “close” together (often measured by the cosine similarity).
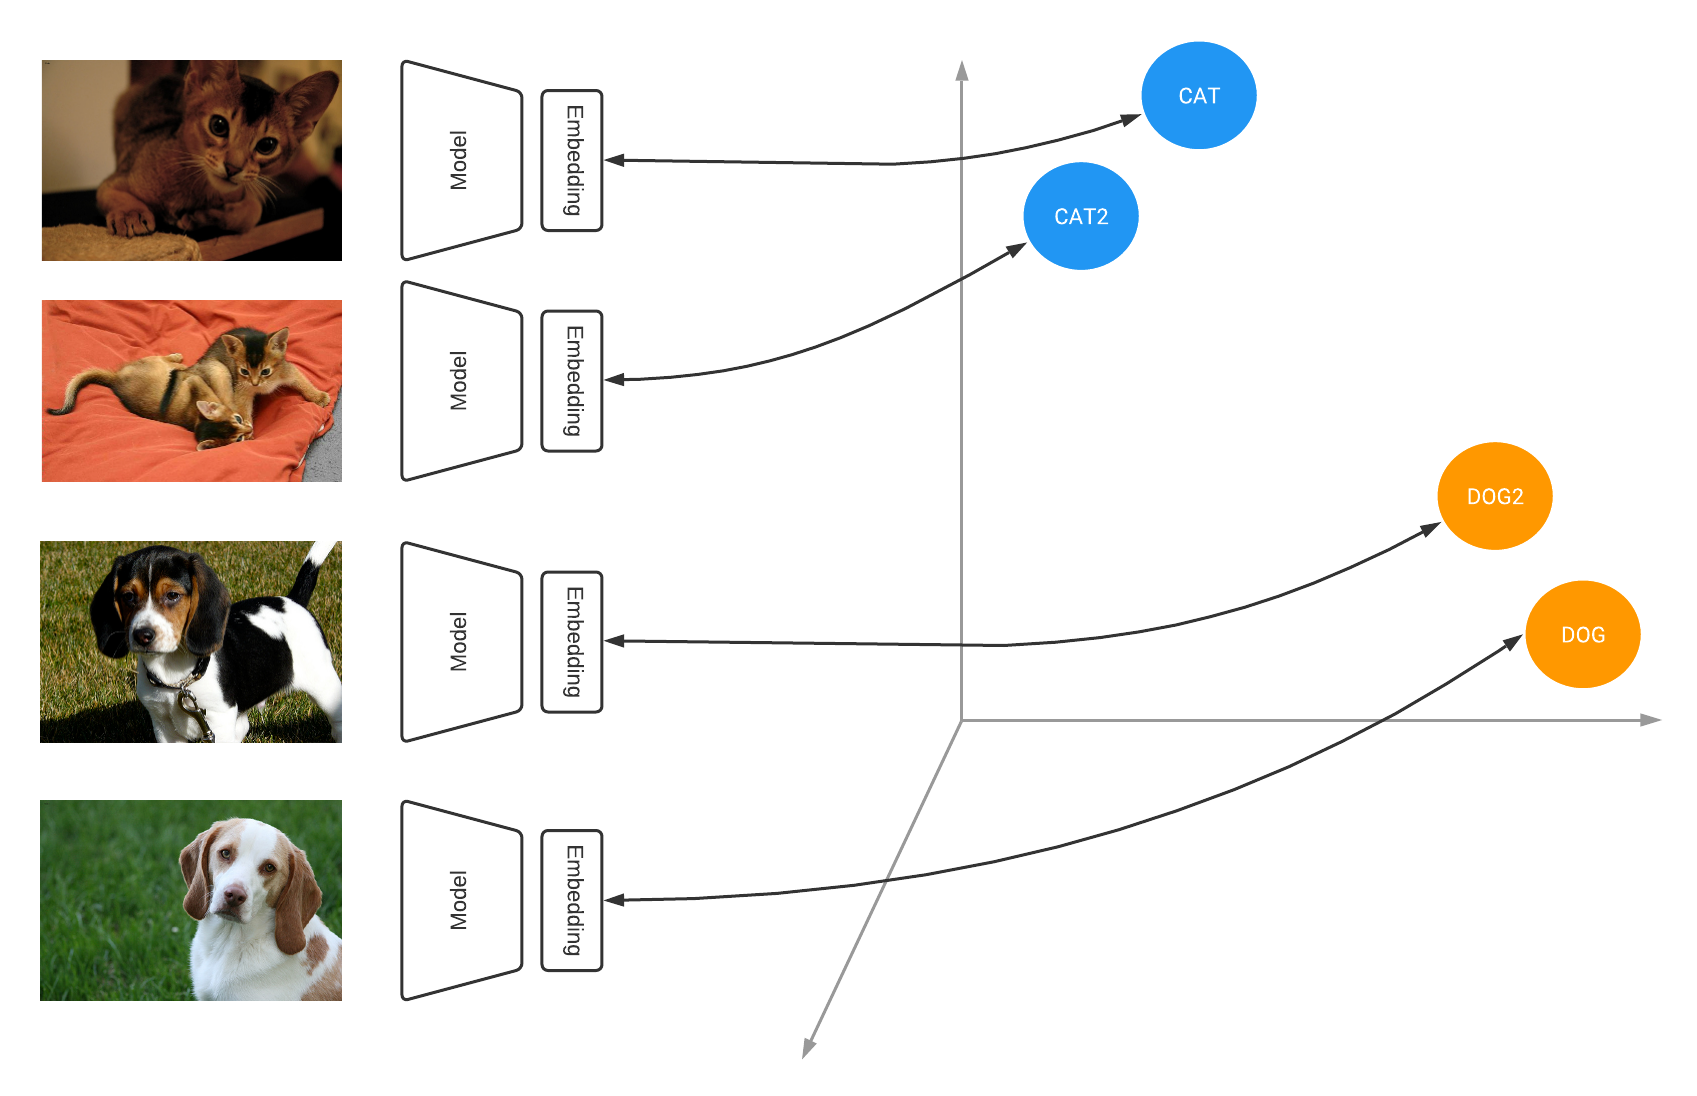
An illustration of image embeddings (source)
Once we had the image embeddings we could then order them by their relative similarity. In the app, we added the functionality to specify a “reference” image, either from the dataset or by uploading any desired picture. The cosine similarity was then computed for every image with respect to the reference and displayed in descending order. The aim being if we uploaded an image of a steering wheel, we should then be met with a page of steering wheels, or at least things that look similar!
We could then select the class we wanted to label the images as (or create a new one if needed), and either individually or bulk select the images to label. This allowed us to fly through 50 images at a time - way faster than manual labelling! And if there was a particularly rare type of image we knew occurred, we could upload an ideal reference image and quickly find any examples in the data set.
The labels were then saved along with the images within the app ready for use in the next section.
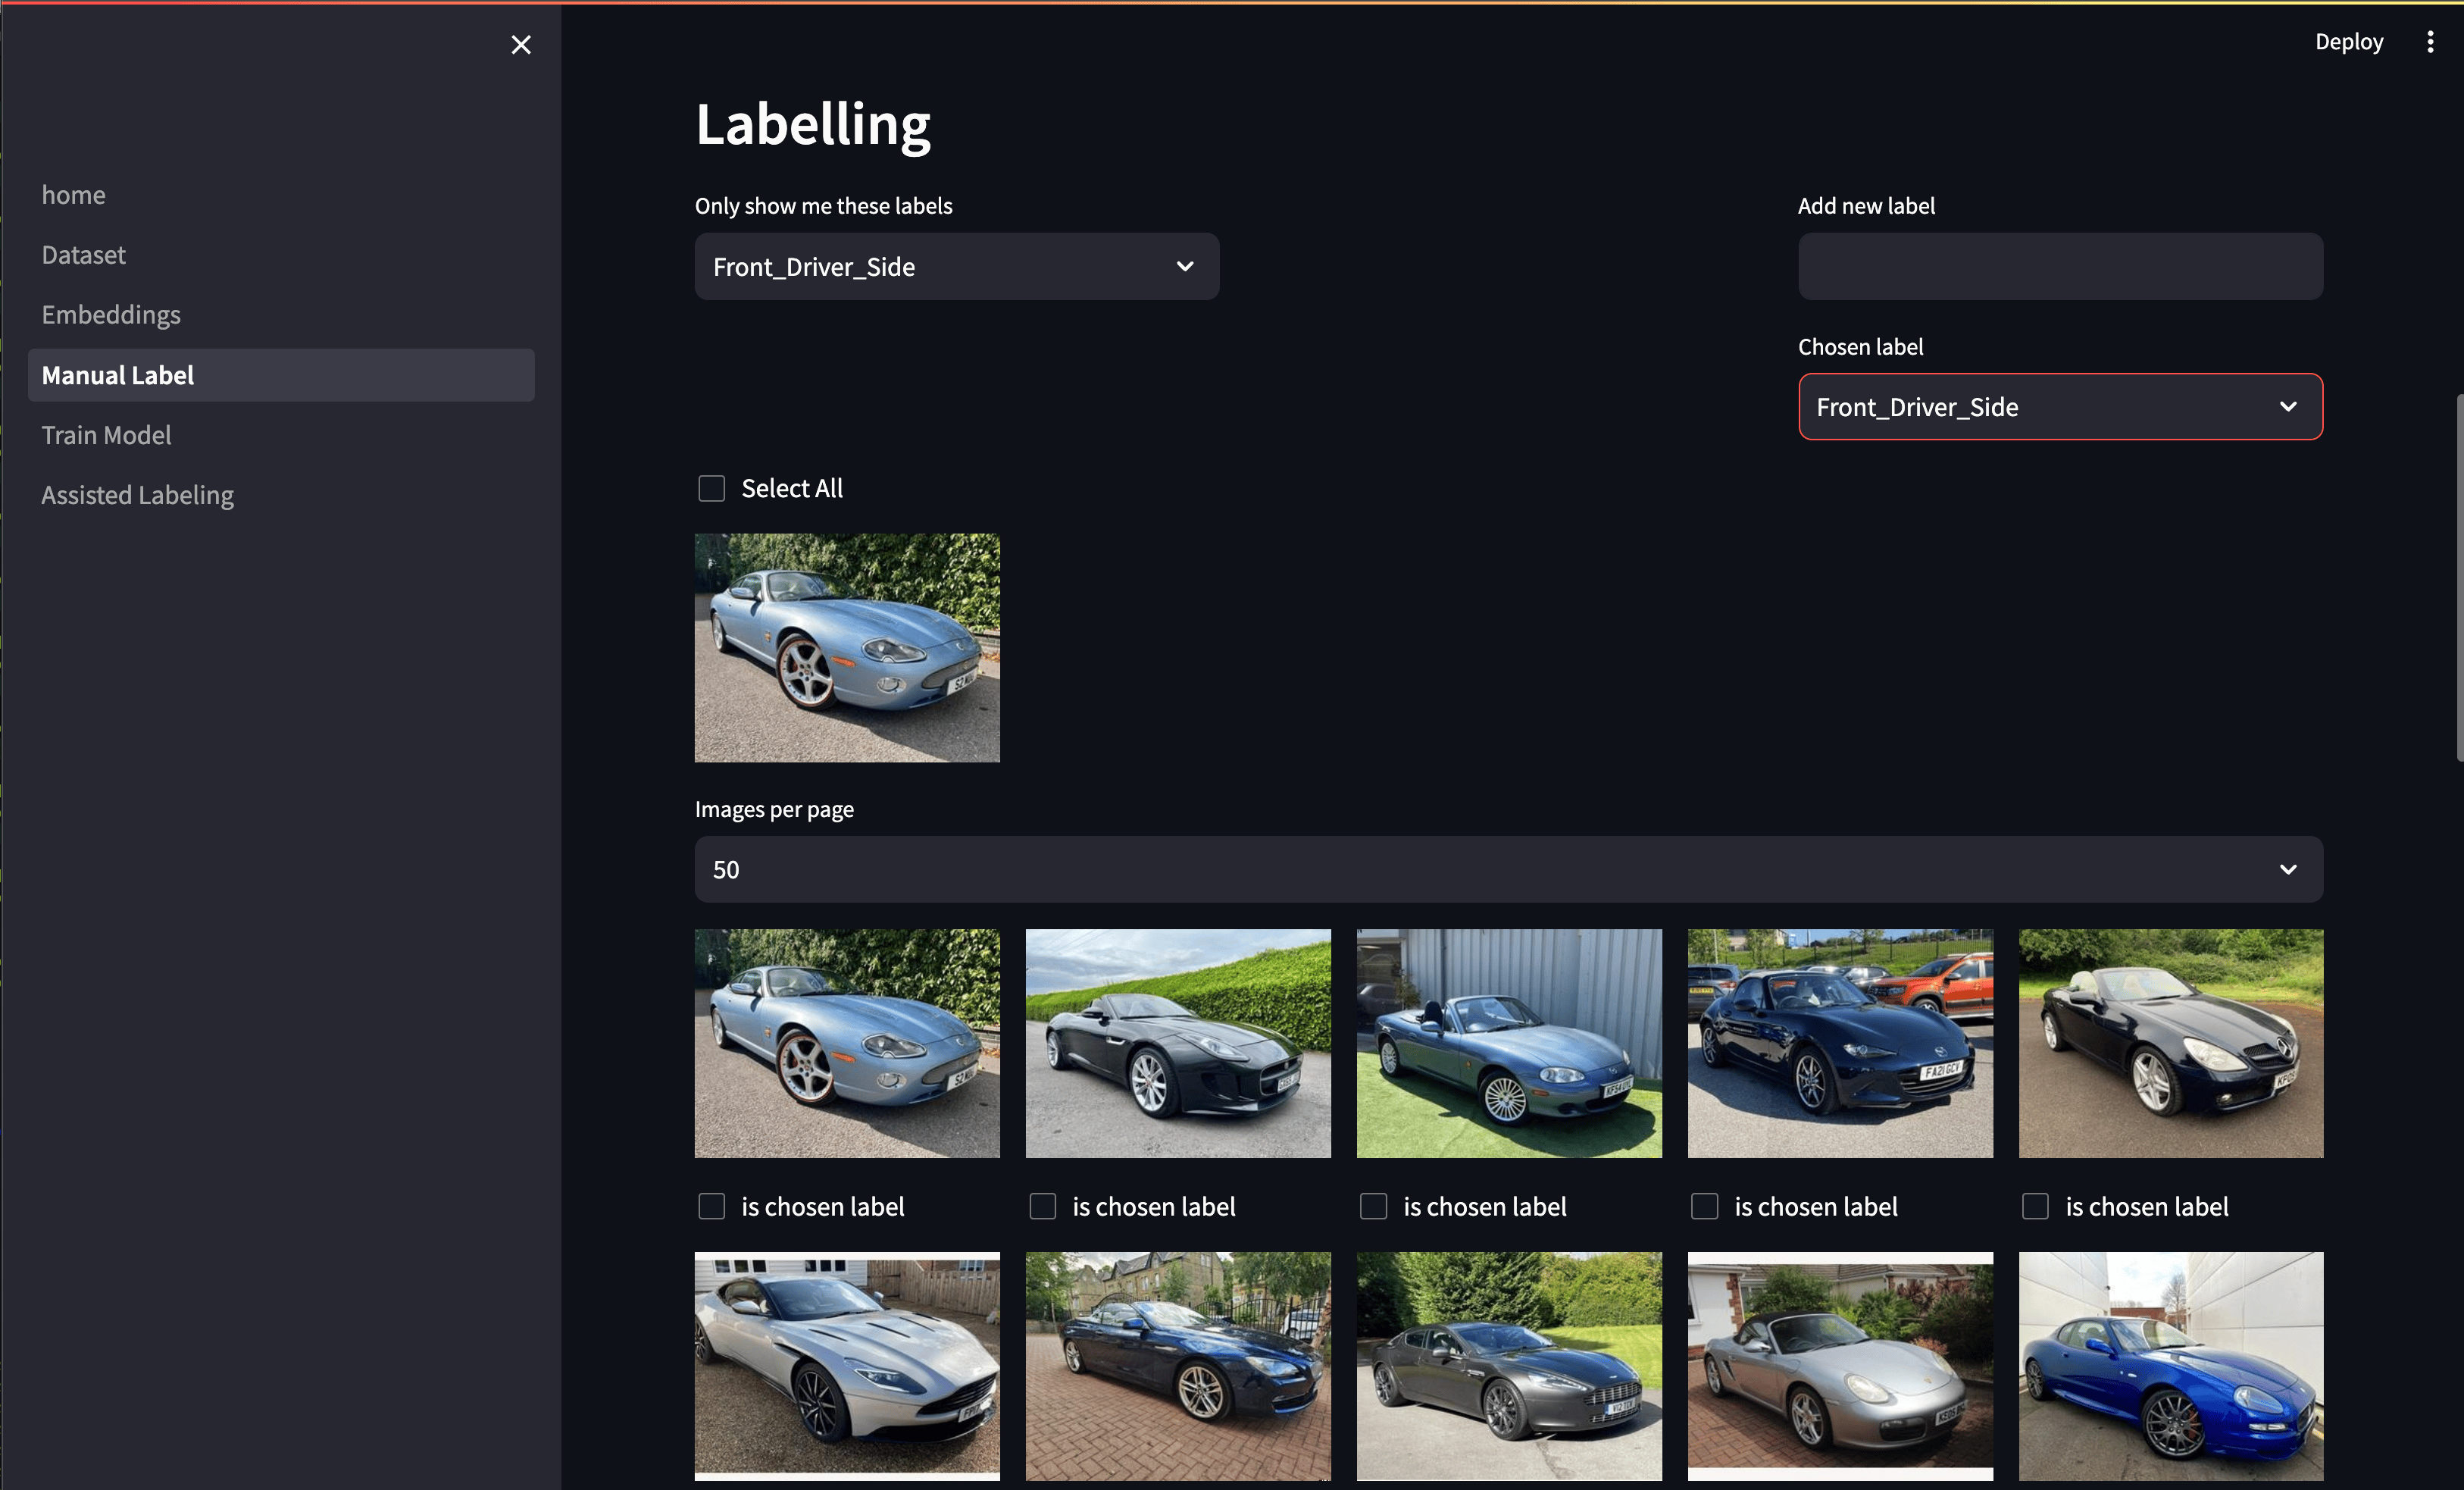
Our similarity-assisted labelling page
Prediction Assisted Labelling
Once we had some coverage across all of our desired classes and the pace of our labelling was starting to slow, we could start the next stage: training a helper model.
The aim here was not to train the best model in the world but to help us quickly get through the easy-to-label images. For this, we trained a relatively small model on the subset of data we manually labelled in the previous step, say ~1k-2k images. Again, Hugging Face can be really useful for finding a decent pre-trained model to fine-tune.
Once we’d trained the model (just a few button clicks in the app) we could then predict labels on the whole dataset. The below screenshot shows an example output. We can filter by the current “manual” label, which in most cases we want to be UNLABELLED as there’s little point looking at the images we’ve done ourselves here! We can then select the class label we want to look at. This ranks all the images by the model’s prediction of being that class. We can then confirm the prediction is correct, in which case the “manual” label is set to match the “predicted” label.
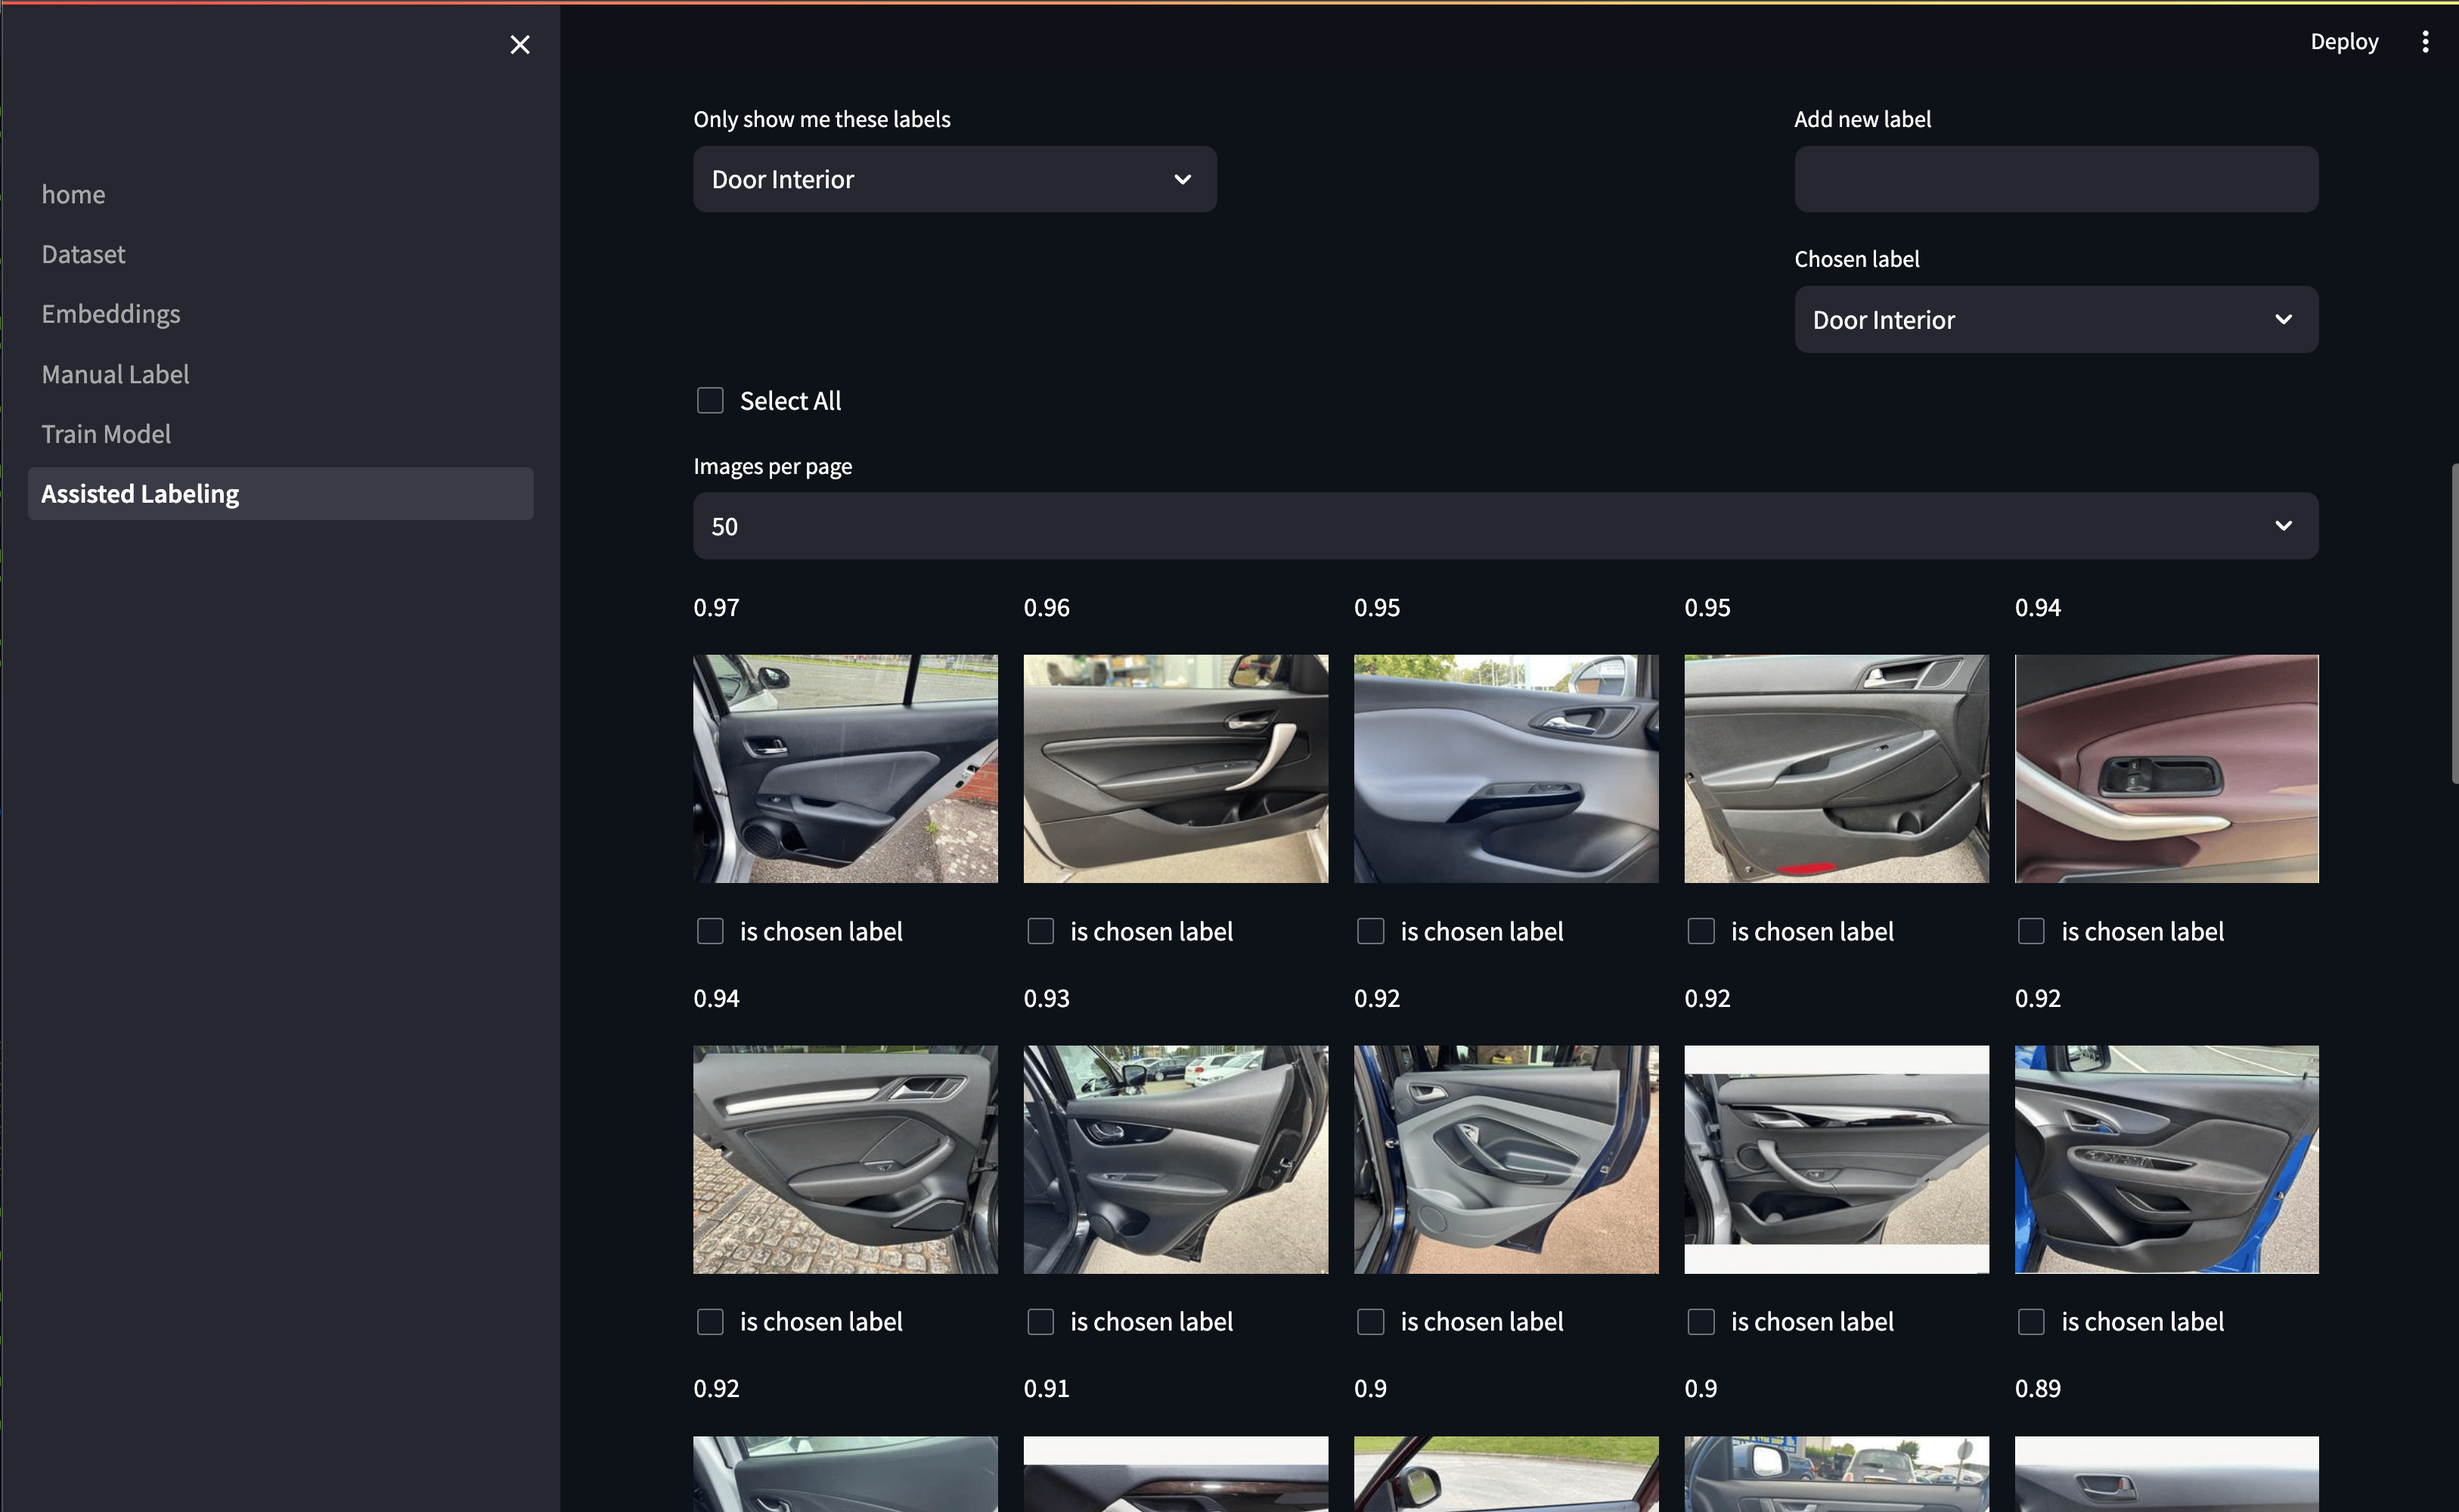
Our prediction-assisted labelling page
Once all the accurate predictions were confirmed we could re-train the model with the additional labelled data for another round of prediction-assisted labelling. Alternatively, we could use that trained model to generate even better embeddings for the embedding-assisted labelling!
After several iterations in the app it took one afternoon to label all 10,000 images for our project. A major improvement on our previous throughput of about 1k-2k per day.
Reflections and Conclusions
When we decided to build this app we were really clear there was no point in building an app to save time labelling images if making the app was going to take 10 times longer than doing it manually in the first place! Our goal was practical functionality, nothing fancy. On this front it has been a big success. We had a basic prototype within a couple of days, and it took a couple of weeks’ work from start to finish, which included things like getting it running in a Docker container, testing, bug fixes etc. Having labelled 10,000 images we then trained a larger model on our Databricks GPU cluster, and using MLflow created a service that can be used to predict the class label of any image on Auto Trader.
This tool means we are now well-placed for any future image models, or if we’d like to adjust the categories in the current model. We’d recommend investing in making a tool like this if you are finding dataset creation to be the bottleneck in your ML workflow. A similar approach could be applied to video or text-based data, too.
Enjoyed that? Read some other posts.
Related Posts
15 Aug 2024—Tom Armitage & Dustin Hayden
Image source: Wikimedia Commons.
The Bayesian approach to A/B testing has many advantages over a Frequentist approach. However, there are some drawbacks. This post discusses these challenges and our attempts to overcome them.
14 Aug 2024—Tom Armitage & Dustin Hayden
Image source: Wikimedia Commons.
Websites are constantly changing. Here at Auto Trader, we use A/B testing to monitor the impact these changes have on the user’s experience. Fundamentally, we need to gather sufficient evidence to make a decision...
04 Jul 2024—Mahmoud Oshagh
Photo by Eugenio Mazzone on Unsplash.
Have you ever stumbled upon something that just completely captivated your attention? That was precisely what happened to me when I first came across Large Language Models (LLMs). It was during...
05 Oct 2023—Tim Summerton-Brier, Stevie Woods, John Harrison
Photo by Tico Mendoza
Back in April, Auto Trader gave a few of us the opportunity to attend Data Council 2023 in Austin, Texas, USA. Data Council is an independently curated conference that covers many aspects of working...
17 Apr 2023—Olivia Pennington & Tom Armitage
Photo by Nik Shuliahin on Unsplash.
You’ve done the hard work in researching, developing and finally deploying your shiny new Machine Learning (ML) model, but the work is not over yet. In fact it has only just...
24 Mar 2023—Tom Armitage & Olivia Pennington
Photo by Stephen Dawson on Unsplash.
Advertising packages are the core product at Auto Trader. Depending on the package tier our customers purchase, they get to appear in...
